
Drawing a dog can be a fun and rewarding experience, whether you’re an aspiring artist or just looking for a creative pastime. With the right guidance, you can create a dog drawing that will impress everyone! This step-by-step guide will walk you through the process, from gathering supplies to adding realistic details.
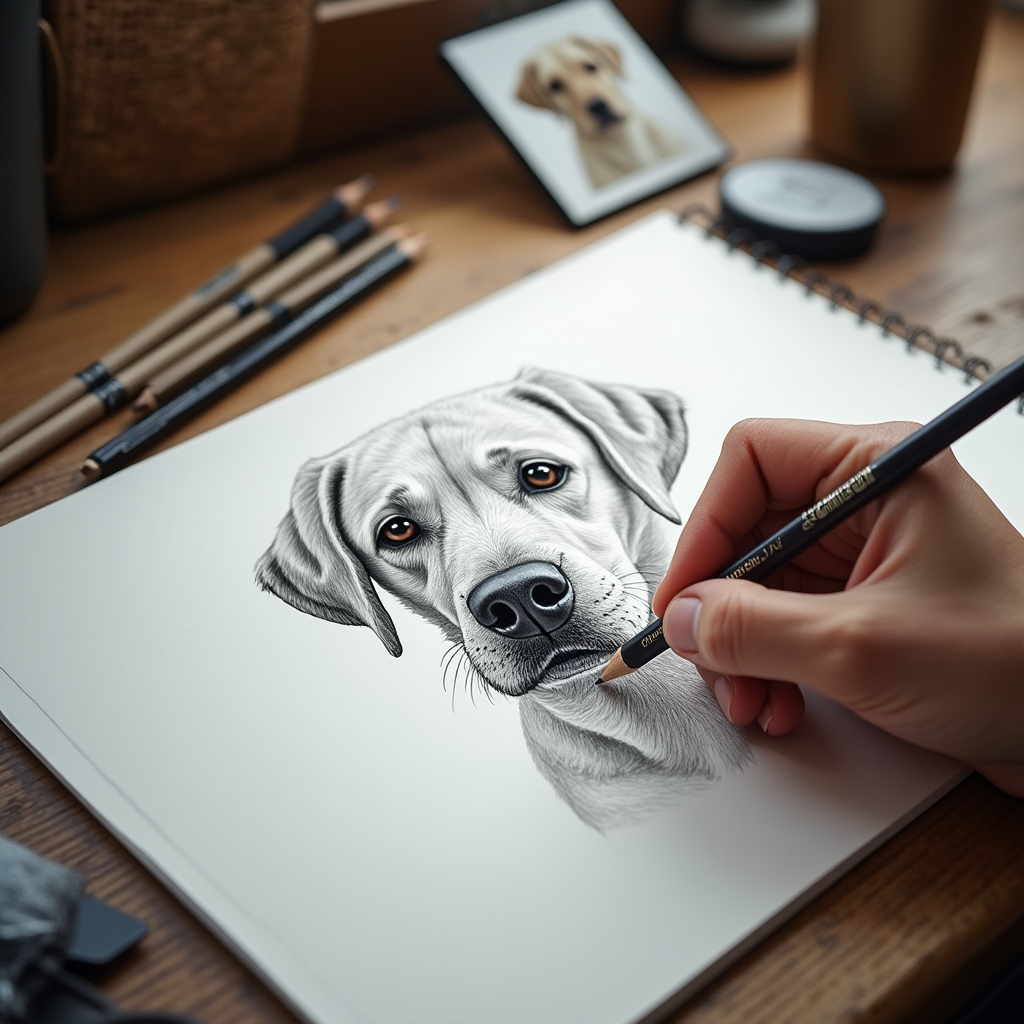
1. Gathering Your Drawing Supplies
Before you begin, it’s important to have the right tools. Here’s what you’ll need:
- Pencils: HB for sketching, 2B-4B for shading
- Eraser: A kneaded eraser for precise corrections
- Paper: Smooth drawing paper or a sketchbook
- Fine liners or markers: For defining outlines
- Colored pencils or digital tools: If you want to add color
2. Understanding Dog Anatomy & Proportions
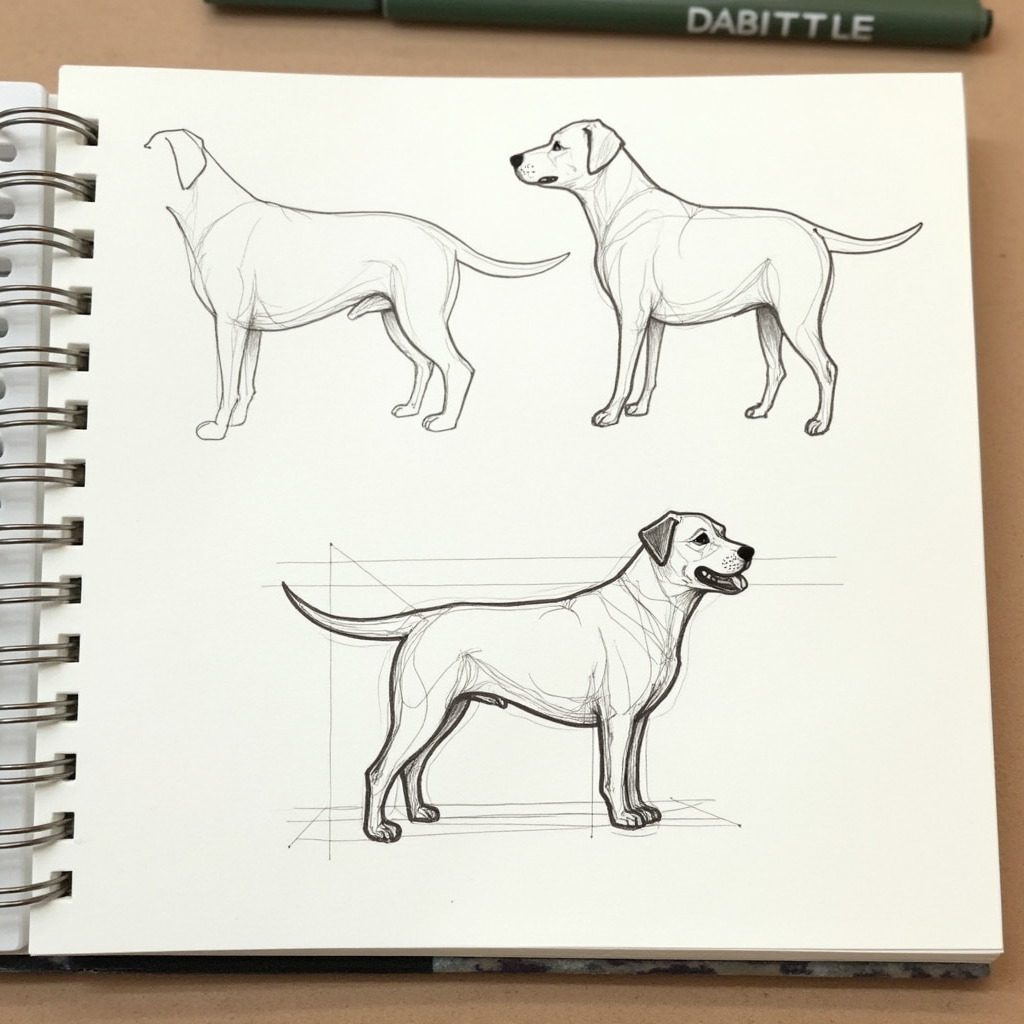
To make your dog drawing look natural, it helps to break the body down into basic shapes:
- Head: An oval or rounded shape
- Body: A larger oval for the torso
- Legs: Cylinders or rectangles to define structure
- Ears & Tail: Simple curves that vary based on breed
Key Tips:
- Observe real dogs or use reference photos
- Keep proportions balanced—puppies have rounder heads, while adults have elongated features
3. Step-by-Step Guide to Drawing a Dog
Step 1: Sketching the Outline
Start with light pencil strokes to draw basic shapes:
- Draw an oval for the head
- Add a larger oval for the body
- Sketch lines for legs, tail, and ears
Step 2: Refining the Features
- Outline the eyes, nose, and mouth
- Adjust the ear shapes based on breed
- Refine the leg thickness for a realistic look
Step 3: Adding Fur & Details
- Use short, quick strokes for a fluffy look
- Shade areas like the eyes and snout for depth
- Blend shading for a soft, natural effect
Step 4: Final Touches
- Define the outlines with a fine liner or darker pencil
- Erase unnecessary sketch lines
- Add highlights to the eyes for a lively expression
4. Tips for Adding Realism & Style
- Capture emotion: The eyes and mouth define a dog’s personality
- Use shading: This adds depth and makes your drawing stand out
- Experiment with styles: Try cartoonish or realistic approaches
5. Common Mistakes and How to Fix Them
- Mistake: Uneven proportions
- Fix: Compare with reference images and adjust symmetry
- Mistake: Overcomplicated fur
- Fix: Use light, natural strokes rather than heavy lines
- Mistake: Stiff poses
- Fix: Add slight curves to make the dog look dynamic
6. Final Touches & Showcasing Your Artwork
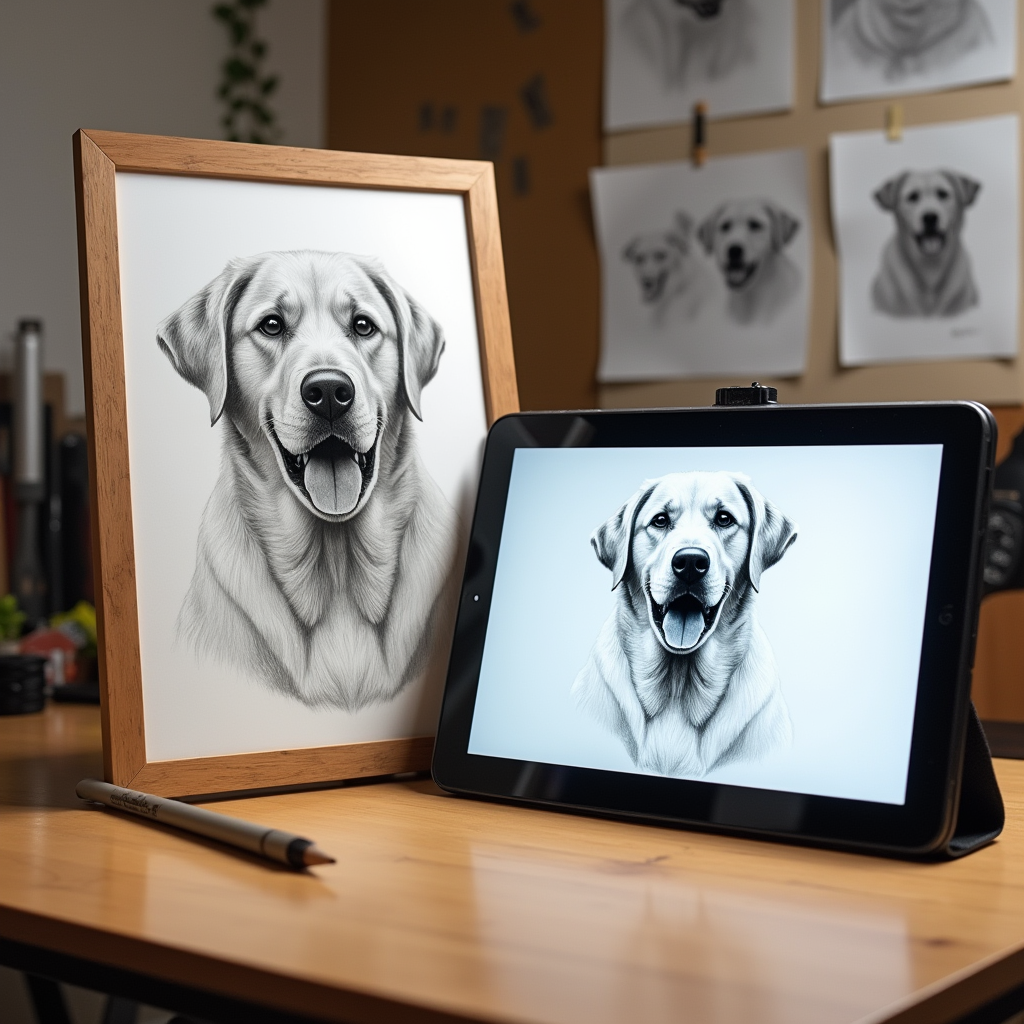
- Use highlights: A white gel pen or eraser can enhance shine
- Digital enhancement: Scan your drawing and add digital effects
- Share your work: Post online or frame it for display!
10 Frequently Asked Questions (FAQs)
- What’s the easiest way to start drawing a dog?
Start with basic shapes and refine them step by step. - Which dog breed is the simplest to draw?
Labrador Retrievers or Beagles have easy-to-draw structures. - How can I make my dog drawing look more realistic?
Focus on shading, fur texture, and accurate proportions. - What are the best pencils for sketching a dog?
HB for outlines, 2B-4B for shading, and fine liners for details. - How do I draw a fluffy dog with detailed fur?
Use light, quick strokes and layer the fur gradually. - Why do my dog sketches look uneven?
Check proportions and symmetry using a reference image. - Can I draw a dog without any prior experience?
Yes! Practice with simple shapes and build your skills over time. - What’s the difference between drawing a cartoon vs. a realistic dog?
Cartoons use exaggerated features, while realism focuses on details and shading. - How long does it take to get good at drawing dogs?
With regular practice, you can see improvement in a few weeks! - Are there any online resources for improving my dog drawing skills?
Yes, YouTube tutorials and art courses can be very helpful.